Real Support
Call or e-mail us. You will get a response from an experienced sign maker that knows this application.
Learn More Here
FAQ - Data Privacy
How do you protect my data?
We start with a secure internet protocol, SSL that is used across the internet to keep people from eavesdropping on your web application transactions. We then use Amazon Web Services which has been certified for compliance with ISO/IEC 27001:2013, 27017:2015, 27018:2019, and ISO/IEC 9001:2015 security standards. We also use strong password to control access to the application database and source code.
Will other CreateABid.com users be able to see my parts list, invoices, user list, etc.?
No. Your data is stored in a database under a key that is specific to your company. Users logged in to other companies will not have access to your business key.
What data do you share with partners?
All data shared with partners is de-identified such that partners will not be able to identify any one user or business. Depending on the partner type, they will be interested in seeing patterns of part usage by time of year, geographic region (state, area of states), number of times accessing certain pages, number of estimates and invoices created, etc. Refer to our privacy policy for more details at https://createabid.com/html/privacy.html.
FAQ - Technical Requirements
What are the computer requirements to use CreateABid.com? What browsers are supported?
CreateABid.com is a web application and thus the bulk of its computer requirements have to do with the web browser you are using. Internet Explorer 9, Chrome 26, and Firefox 15 on Windows 7/8/10, Linux and MacOS Snow Leopard (or later) are browsers supported by CreateABid.com. Other browsers should work as well. If your computer is already slow when operating Gmail or Yahoo Mail or when watching YouTube videos or accessing your bank’s web application, it will be safe to assume that it will run slow when using CreateABid.com.
FAQ - Subscriptions
How can I track the number of estimates I create?
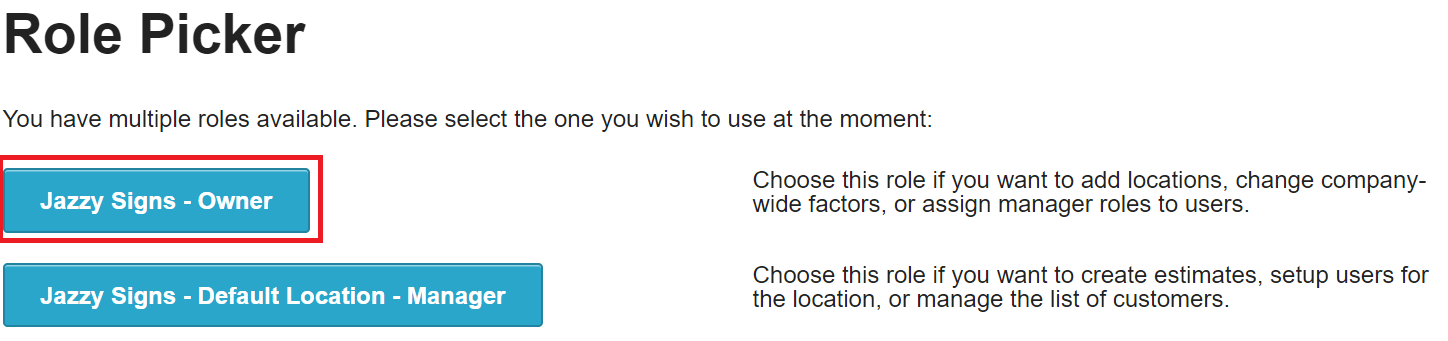
Login to createabid.com and choose the Owner role.
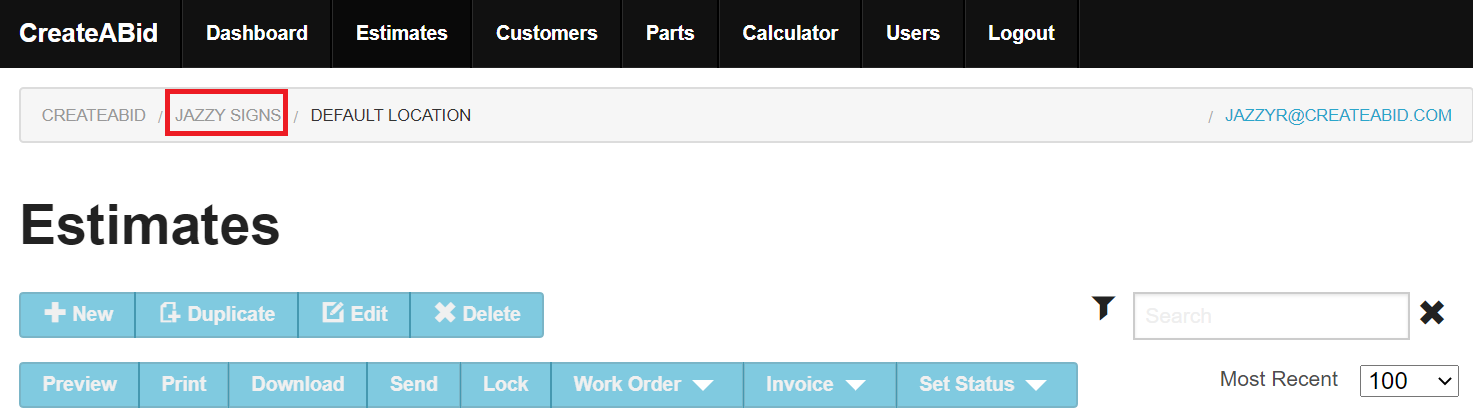
Click on the business name in the navigation string at the top of the page.
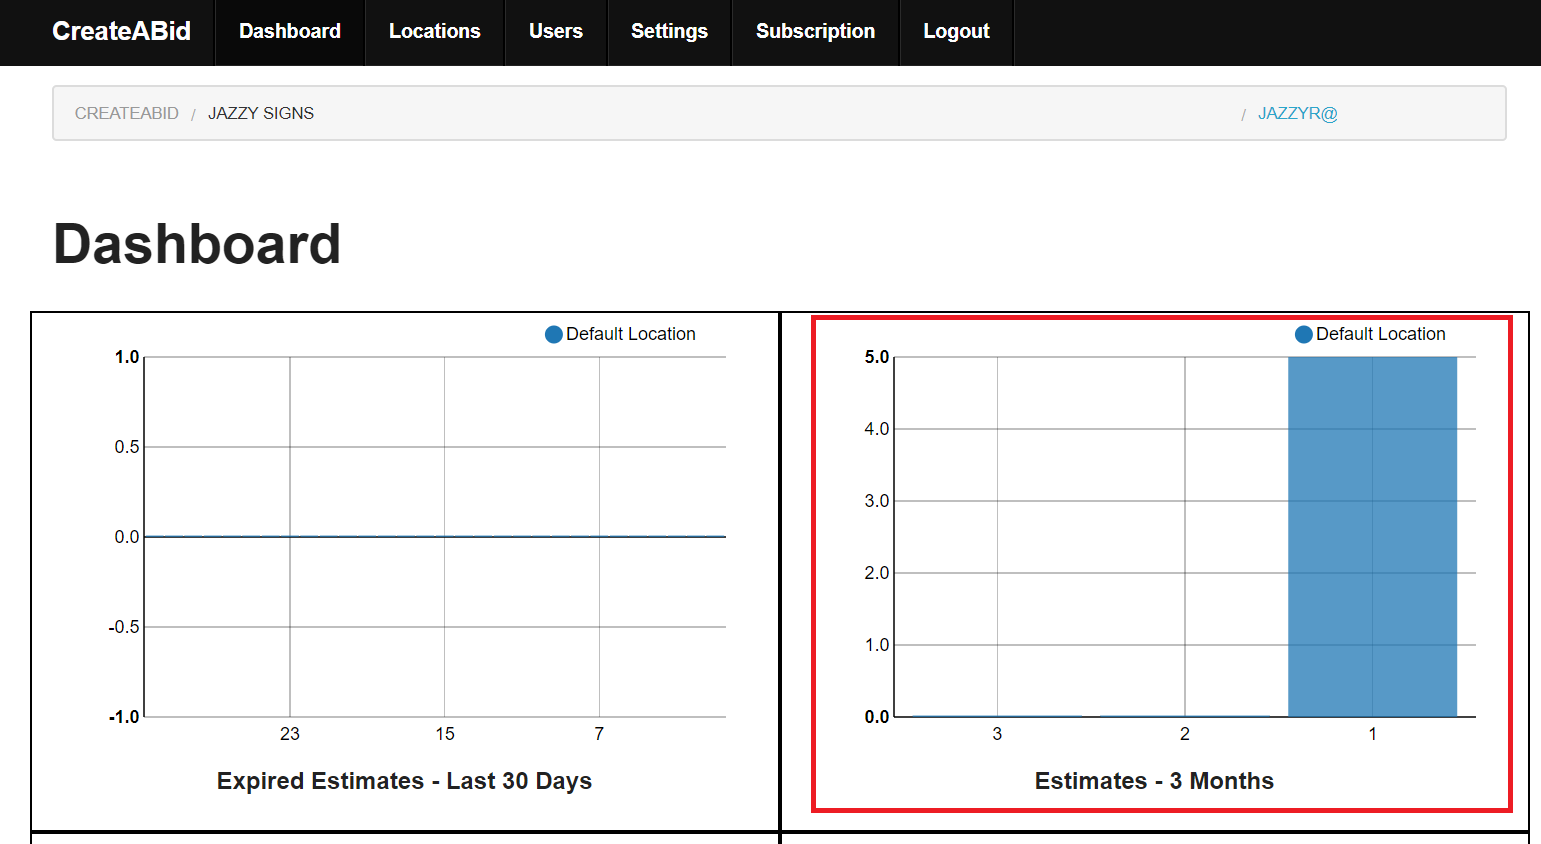
On the Dashboard review the number of estimates created in the top-right chart.
How do I know when I need to change my subscription level?
The Createabid.com support team will monitor the number of estimates that you create. If the number of estimates in the two previous calendar months exceed your subscription level, Createabid.com support will contact you by e-mail and ask you to adjust your subscription level.
How do I change my subscription level?
Login to createabid.com and choose the Owner role.
Click on the business name in the navigation string at the top of the page.
Click on the Subscription link at the top of the page.

On the subscription page, click Edit button, make changes, and click Save.
Do I have to provide a credit card number in order to try the application during the 60-days-free promotion?
A credit card number is not required when you sign up for the first-60-days-free period. However, if you wish to continue using Createabid.com to create/modify estimates after the introductory period, you will need to provide a credit card that will be used to pay for your subscription.
Can I pay with a check or PayPal instead of a credit card?
At this time we only accept credit cards.
Can I get a refund for a partially used month?
No. All subscription payments are non-refundable. However subscriptions can be canceled at any time without penalty.
Do you keep my credit card information on file? Will it be secure?
We use the services of http://stripe.com to manage your subscription payments. We use their web services to accept your credit card information and transact payments. Stripe.com complies with all security regulations related to credit card data and transactions. Refer to stripe.com’s terms of service for more information (https://stripe.com/us/terms).
What are the Terms of Service for CreateABid.com?
The latest copy of Createabid.com Terms of Service can be found at https://createabid.com/html/tos.html.
FAQ - Features
What types of signs are supported in CreateABid?
All traditional sign types are supported in the CreateABid estimator. The primary component types are vinyl, laminates, substrate, accessories, ink and sub-contract. You can also create custom parts to include in your estimates.
Can I create my own parts and/or materials to include in my estimates?
Yes. You can build your own catalog of parts that describe the cost per unit (square feet, linear feet, per piece) and the minimum order for items. Your created parts will appear in the parts list and search results just the same as the CreateABid pre-populated parts.
How many lines are available on a CreateABid estimate/invoice?
As many lines as you need. The estimate and invoice will span as many pages as needed to include all the parts included in the job.
CreateABid also gives you a feature to consolidate your parts into a summary for your customer – giving you all of the materials and labor information you need without confusing your customer.
Can I change the price, width, or dimensions of the parts that come pre-populated with CreateABid?
Yes, the parts that come with CreateABid.com are the most commonly used parts in the industry. These parts are editable and can be changed using your prices at any time. The "Catalog" (accessed via a button on the Parts setting page) is a list of all parts from various vendors. The library will get updated periodically with price changes, adjusted minimum quantities, new items, and removal of discontinued items. You have the ability to import Catalog parts as needed and adjust with custom pricing and other changes.
How do I transfer an invoice to my accounting system?
Open an estimate, click on ‘Invoice’, then click the ‘Export’ menu item to create an .IIF export file. The .IIF file can be imported by most versions of the QuickBooks® desktop software packages. Check with your accounting software vendor to determine if your accounting package supports .IIF file imports.
How do I request new features in CreateABid?
Email us at support@createabid.com or call (972) 379-8420.
Where can I find answers on how to use CreateABid.com?
See the How-To and Training Videos below.
Email us at support@createabid.com or call (972) 379-8420.
Is there training available for using CreateABid.com?
Training videos can be found below.
Can I use CreateABid.com on my mobile phone or on my tablet computer?
Yes, but the CreateABid.com application is not yet optimized for small-format screen and touch interfaces. That will be a future enhancement if there is adequate demand for the capability.
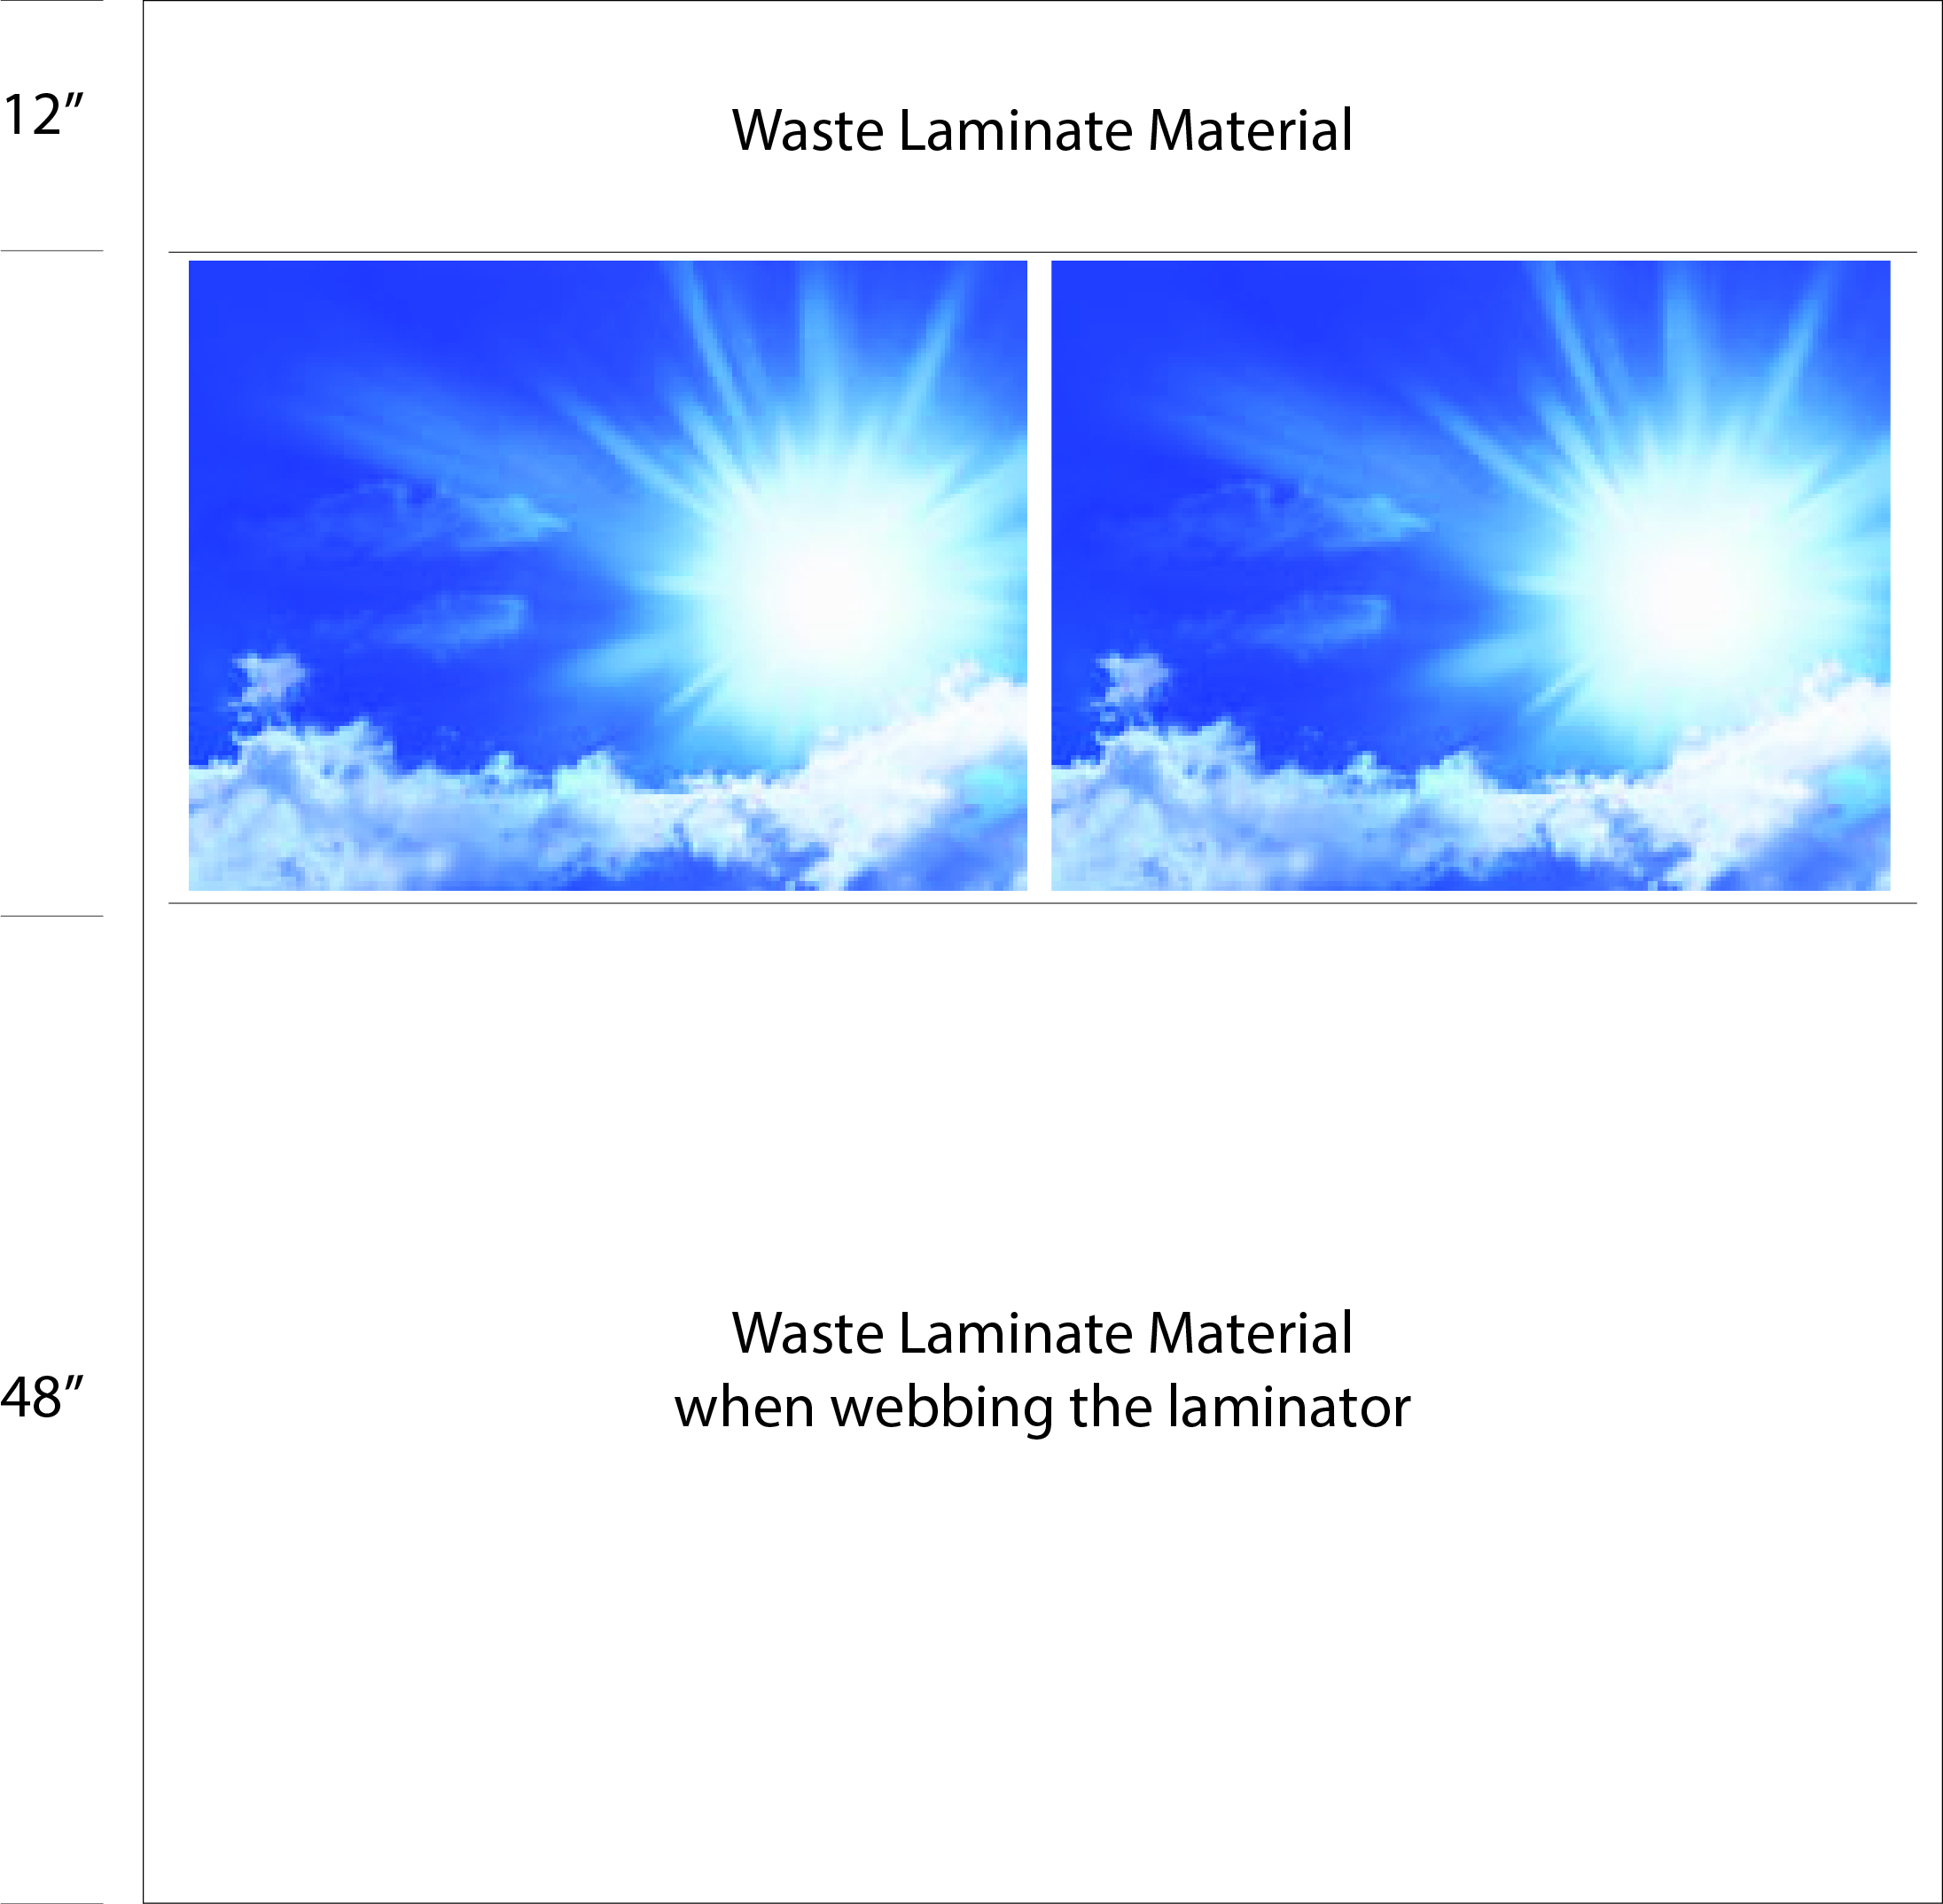
What is the scrap factor?
Create A Bid software standard setting is 2 linear feet for print material and 5 linear feet for laminates. This can be found in the settings area using your business admin login under scrap factors.
Example: When printing on 54”material you will have 1’ in front of the print and 1’ at the end of the print that is scrap.
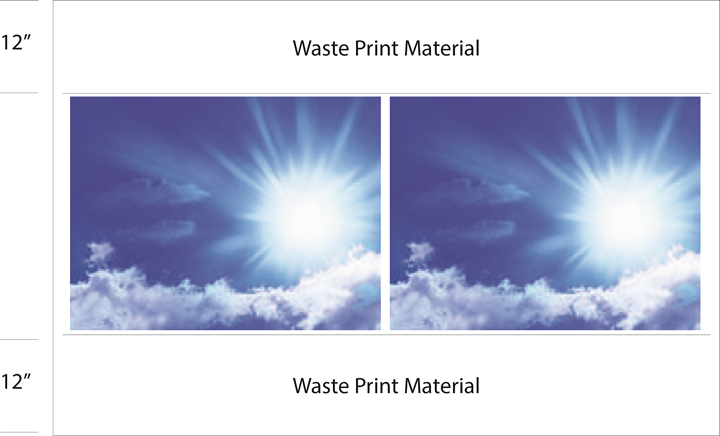
Laminate Scrap: When webbing the laminator you will use approximately 5’ of material. We calculate 4’ for webbing and 1’ at the end of the run. See example image.
How do I know my cost per square foot?
In the calculations section of the items screen you will find your cost per square foot along with other cost associated with the line item.
Why is the price calculated in linear feet?
We have found that using a square foot pricing structure is either over charging or under charging for materials. Pricing by the linear foot you are pricing your products by the actual amount of material that is being used.
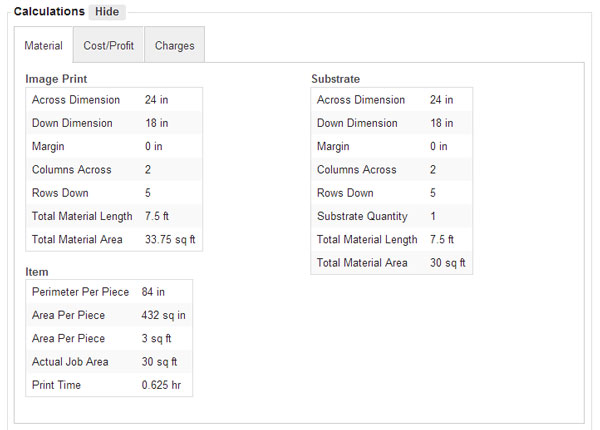
What is the print configuration and substrate configuration?
In the items section under materials you will see the number of pieces you can get across and down. This will change depending on the quantity you enter. This is also based on the size of print material you have entered. In this case we have 18”x24” prints on 54” vinyl.
This is true for the substrate calculations as well. Based on the size and quantity that you enter, the software will nest the size on the substrate that you have selected. This is showing that we are getting 2 columns across and 5 rows down, for a total of 1 sheet for a quantity of 10 pieces.
What materials can be entered?
In the parts section you can enter rolled, ridged and accessories parts into the system. The rolled materials are calculated in Linear Feet and the Ridged are calculated in Square Feet. Refer to the parts section for adding a new part for these options. You can also add a part called an accessory part. Accessory parts are stakes, frames, or specialty items that you need.
Training
Video - How to create a banner estimate
Watch this video for tips on creating a banner estimate.
Video - How to create a custom part
Watch this video for tips on creating a custom part that can be included in estimates.
Video - How to create an estimate for a vehicle wrap
Watch this video for tips on creating a vehicle wrap estimate.
Video - How to import parts and customers
Quickly import your parts and customers by uploading comma-separated-value (CSV) files.
Watch this video.
Video - Send an estimate to customer
Once an estimate is complete and ready for customer review, you can send the estimate to the customer using CreateABid.
Watch this video.
Video - Setting up your business account and add users
It's easy to set up your business account and add users who will be creating estimates. Step through the Locations, Users, and Settings menus to add information that will populate estimates, enable users, and set rates and factors for your calculations.
Watch this video.
How-To
How to import parts
Use these steps to import parts into CreateABid for your business.
Create the Import File with Parts to be Imported
1. Create a new spreadsheet with these columns. (You can download a file with these headers here.)
Description Type Units Width Length Minimum Order Cost Per Unit Cost Per Whole
2. Populate the spreadsheet with the parts you want to import
3. Valid values for Type are accessory, print, laminate, and substrate
4. Valid values for Units are linear foot, square foot, and each
5. For parts that have unit type of square foot, width, length, and minimum order values should be included.
6. For parts that have unit type of each, width and length are not required
7. Save the file to your local drive as a CSV (comma separated value) file
Here is a view of a sample file:

Import the File
1. Login as a user that is the owner of the business and/or a location manager.
2. Go to the Dashboard for that location
3. Go to the Settings page
4. On Settings, choose Parts

5. Click on the Import button
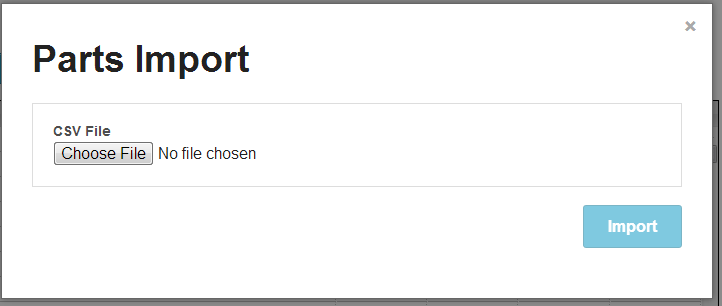
6. Click Choose File and select the CSV file that you created and saved from the steps above
7. Click the Import button
8. Do a search on the parts list to verify that the parts are not show in your list.
How to import customers
Use these steps to import customers into CreateABid for your business.
Name, Customer Number, Address1, Address2, City, Zip Code, State, Account Contact, Account Email, Accounts Payable Contact, Accounts Payable Email, Phone, Fax, Default Terms, Type, Sales Tax Rate, Tax ID Number, Notes C.O.D. Charge Credit Card On File Due Upon Receipt Net 15 Days Net 30 Days |
Here is a view of a sample file:

How do I create multiple line items?
Click on the estimates button and create a new estimate. From the items tab your new item will be ready to be entered. Enter the quantity, length and width of the item and select a margin. Enter the print material, laminate material and substrate material. You then will choose your selectors that you will be using for the project and click the save button. This saves the item into the first line item of your estimate. You will see the item you entered to the left of the screen after it has been saved. You will be able to click on the button to the left to further edit the item. Continue this process for the next and so on. There is no limit to how many items you can enter.
Also see this tutorial on creating a banner estimate.
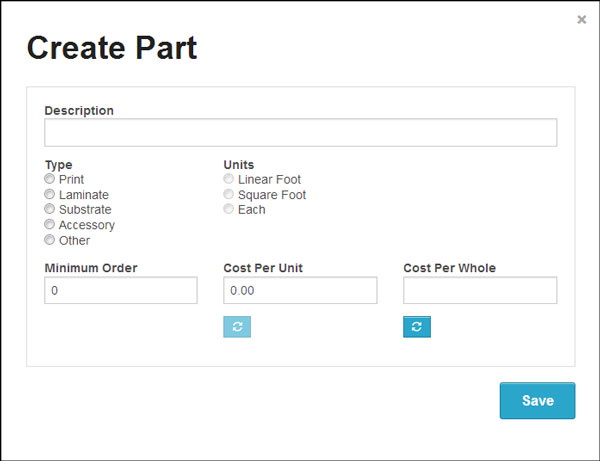
How do I add an accessory part?
You can quickly add an accessory part from the items screen when you are entering a part. In the accessories section click the add button and the parts dialog box will appear. Enter the specifications of the part and click the save button. The part is now ready to be used in the menu.
How do I determine the margin?
A margin will add space between your prints. For instance: If you have prints that are 18”x24” and you are printing on 54” material and add a margin of .25” then your final size of your prints will be 18.25”x24.25”. This is important for the substrate calculations.
Adding a margin to the project will affect how many sheets of substrates will be used.
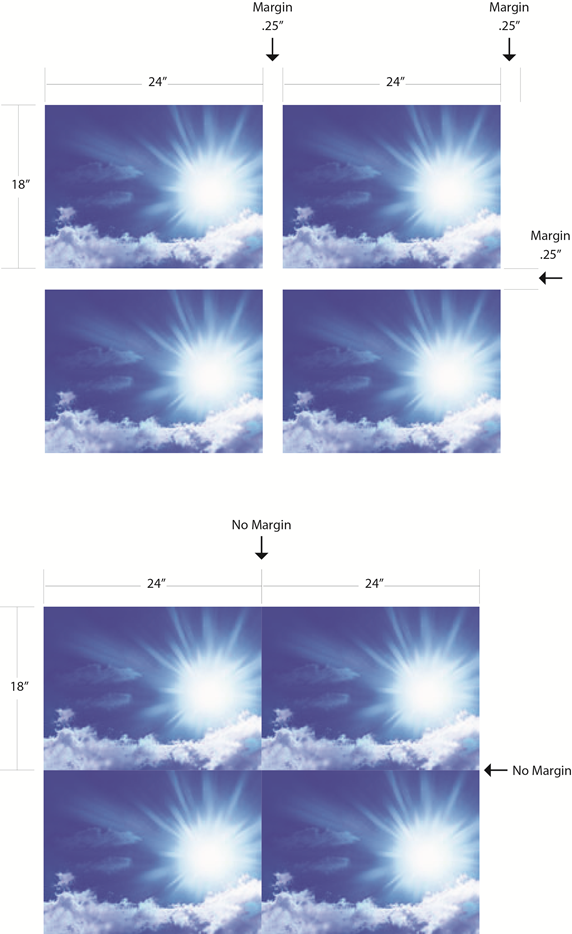
As you can see from the example that adding a margin can increase the size overall, if you are planning to use a substrate such as coroplast, your prints will fall off the substrate. In this case, print the 18”x24”with no margin so that they fit on the substrate with no waste. If you were just producing prints on 54” material then your margin will be ok.
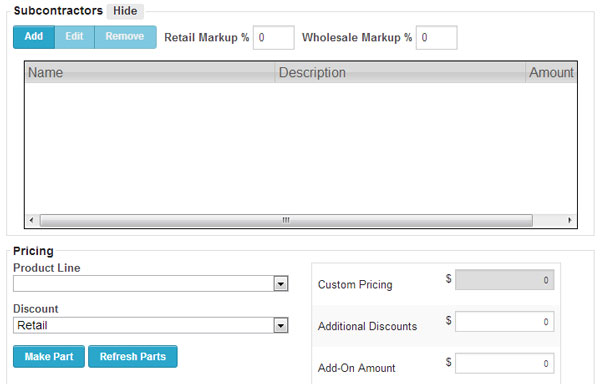
Can I enter a subcontract amount?
Yes, under the items tab click on the show button next to the subcontractor section. Here you have the ability to add either a wholesale or a retail amount and choose your mark up.
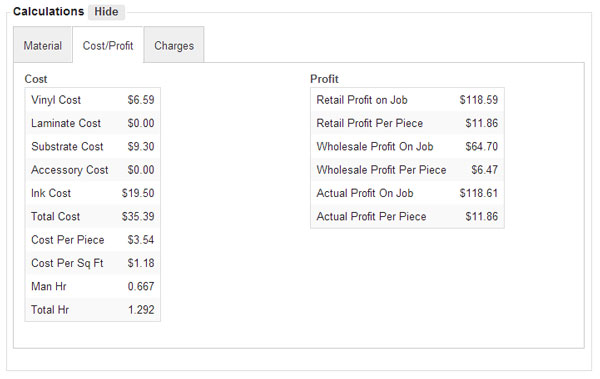
How do I calculate my cost?
The cost section of the calculations button you can see your cost for every part that has been added to the line item. This area is specific to the item that you are on. To see your total cost for the entire estimate you will need to go to the summary tab and here you can see your total cost and profit.
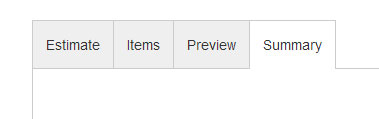
How do I see my profit?
In the summary tab you can view your total cost and total profit for the entire project. The summary tab is in its own section for your privacy. Here you can take a look at discount levels, production cost, print time and more. All of the technical data that you will need to know will be in this section. Click on the Summary tab a top of the estimate screen.
How to import a CreateABid invoice into QuickBooks unsing an IIF file
Follow these steps to import a CreateABid.com invoice into QuickBooks using an Intuit Interchange File, or IIF, file.
|
Adding logos to your estimates and invoices
You can add your company logo to your estimates, work orders, and invoices by following these steps.
|
* The logo image will be dynamically resized to fit to a maximum height of 160 pixels or to a maximum width of 263 pixels. If the logo size is adjusted, it will be done proportionally so that the image won't be skewed.
Clearing browser cache
When changes are made to the CreateABid.com application, it may be necessary for you to clear your browser's cache (pronounced like cash). A browser's cache is temporary storage of web program code and data that speed up the performance of an application such as CreateABid.com. When CreateABid.com changes are installed on the cloud server, it is a good idea to clear your browser cache to make sure you are getting the latest version of the application. The timing of application changes will be included in our change announcements.
Here are the instructions for "clearing the cache" in the Google Chrome, Firefox, and Internet Explorer browsers. If you have any difficulties following theses instructions, contact us at (972) 379-8420 or support@createabid.com.
Google Chrome
1. Click the menu button at the top-right area of the browser, click Tools, click Clear browser data... (or click Control-Shift-Delete)
2. Clear all the check boxes EXCEPT "Cached images and files"
3. Click the "Clear browsing data" button
More information: https://support.google.com/chrome/answer/95582?hl=en
Microsoft Internet Explorer
1. Click the sprocket icon at the top-right area of the bowser
2. Click the Internet Options menu item
3. On the General tab, under the Browsing History section, click the Delete... button
4. Uncheck all the items EXCEPT "Temporary Internet files and website files"
5. Click the Delete button
More information: http://windows.microsoft.com/en-us/windows7/how-to-delete-your-browsing-history-in-internet-explorer-9
Firefox
1. At the top of the Firefox window, click on the Firefox button and then select Options
2. Select the Advanced panel.
3. Click on the Network tab.
4. In the Cached Web Content section, click Clear Now.
More information: https://support.mozilla.org/en-US/kb/how-clear-firefox-cache